Argo CD 설치하기

Overview
Argo CD는 지속적인 배포 환경을 구성하기 위한 툴입니다.
이 문서에서는 Argo CD를 Kubernetes 환경에 구성하는 방법에 대해 알아보겠습니다.
사전 준비
Kubernetes 클러스터 구성
Argo CD를 설치할 Kubernetes 클러스터 환경을 준비합니다.
Kubectl CLI 설치
Argo CD를 설치하기 위해 kubectl cli를 설치합니다.
Argo CD 설치
argocd namespace를 생성하고 kubectl 명령을 통해 argocd를 kubernetes cluster에 배포합니다.
kubectl create namespace argocd
kubectl apply -n argocd -f https://raw.githubusercontent.com/argoproj/argo-cd/stable/manifests/install.yaml
정상적으로 배포되었는지 조회해봅니다.
kubectl get po -n argocd
NAME                                             READY   STATUS    RESTARTS   AGE
argocd-application-controller-5576758b85-r45zq   1/1     Running   2          26m
argocd-dex-server-c87ff4c6-kgrcp                 1/1     Running   1          26m
argocd-redis-6f4db95c5-r5zbp                     1/1     Running   0          26m
argocd-repo-server-7dc5cc9b47-4m6ng              1/1     Running   0          26m
argocd-server-67c6bd95bc-7qdbl                   1/1     Running   0          26m
Argo CD CLI 설치
Argo CD Release 페이지에서 CLI 바이너리를 다운로드합니다.
//OSX
curl -LO https://github.com/argoproj/argo-cd/releases/download/[VERSION]/argocd-darwin-amd64
chmod u+x argocd-darwin-amd64
mv argocd-darwin-amd64 /usr/local/bin/argocd

//Linux
curl -LO https://github.com/argoproj/argo-cd/releases/download/[VERSION]/argocd-linux-amd64
chmod u+x argocd-linux-amd64
mv argocd-linux-amd64 /usr/local/bin/argocd
Argo CD API 서버에 접속하기
Argo CD 설치 시 기본 설정은 API 서버를 외부 주소로 노출시키지 않습니다.
아래와 같이 세 가지 방법으로 API 서버를 외부에서 접속할 수 있습니다.
-
Service Type을 Load Balancer로 설정
아래 명령을 실행하여 Service Type을 Load Balancer로 설정합니다.
kubectl patch svc argocd-server -n argocd -p '{"spec": {"type": "LoadBalancer"}}' -
Ingress 설정
아래 가이드를 참고하여 Ingress를 설정합니다.
https://argoproj.github.io/argo-cd/operator-manual/ingress/
-
Port Forwarding 설정
아래 명령을 실행하여 Port Forwarding을 설정합니다.
http://localhost:8080으로 서버에 접속할 수 있습니다.kubectl port-forward svc/argocd-server -n argocd 8080:443
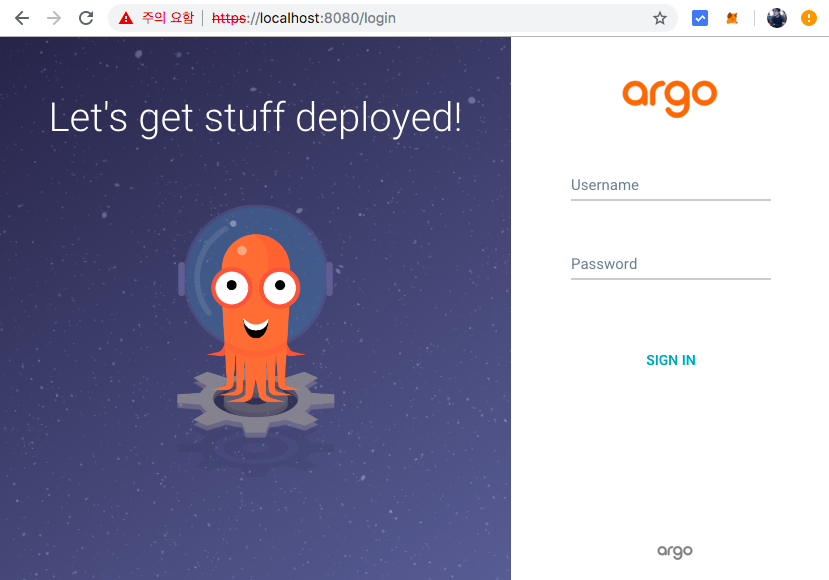
로그인
Argo CD의 admin 계정 암호는 argocd-server pod 이름으로 자동 설정됩니다.
kubectl get pods -n argocd -l app.kubernetes.io/name=argocd-server -o name | cut -d'/' -f 2
위의 암호를 사용하여 admin으로 로그입합니다.
argocd login [SERVER_ADDRESS]
아래 명령을 실행하여 패스워드를 변경합니다.
argocd account update-password
웹 브라우저를 통해서도 서버에 접속할 수 있습니다.
샘플 애플리케이션 배포
이제 Argo CD를 활용하여 샘플 애플리케이션을 배포해보겠습니다.
CLI 사용
Argo CD CLI를 사용하여 샘플 애플리케이션을 배포합니다.
-
아래 명령을 실행하여 샘플 애플리케이션을 생성합니다.
argocd app create sample-app \ --repo https://github.com/argoproj/argocd-example-apps.git \ --path guestbook \ --dest-server https://kubernetes.default.svc \ --dest-namespace default -
생성한 sample-app을 조회해보면 STATUS가 OutOfSync입니다.
$ argocd app get sample-app Name: guestbook Server: https://kubernetes.default.svc Namespace: default ... GROUP KIND NAMESPACE NAME STATUS HEALTH apps Deployment default guestbook-ui OutOfSync Missing Service default guestbook-ui OutOfSync Missing -
아래 명령을 실행하여 sample-app을 동기화합니다. 동기화하면 kubectl apply 명령을 실행해 애플리케이션을 클러스터에 배포합니다.
argocd app sync guestbook
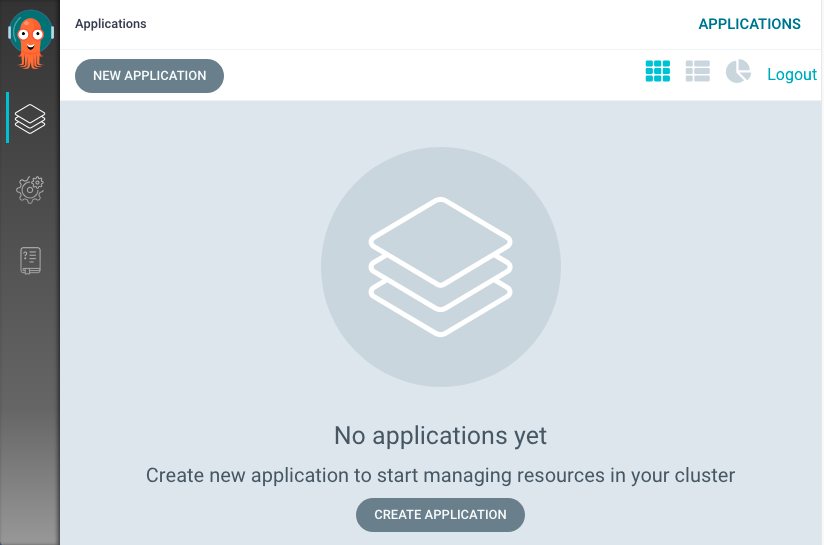
UI 활용
웹 브라우저에서 Argo CD UI를 통해 샘플 애플리케이션을 배포해보겠습니다.
-
Create Application 버튼을 선택합니다.
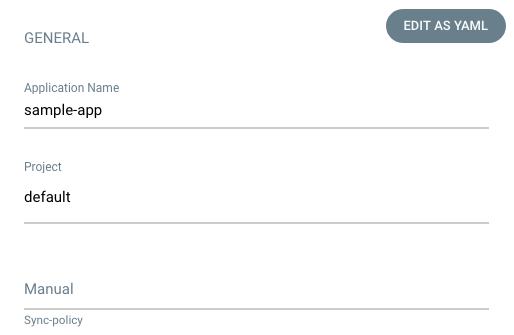
-
Application Name에 sample-app, Project는 default를 선택합니다.
-
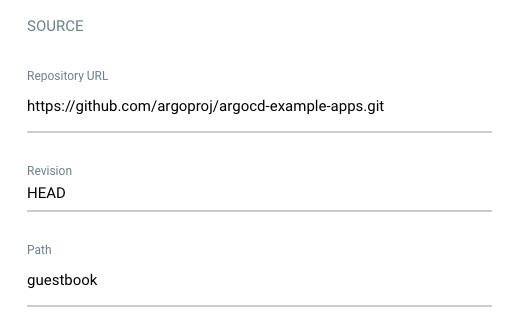
Repository URL에 https://github.com/argoproj/argocd-example-apps.git 를 입력합니다. Revision은 Head, Path는 guestbook을 입력합니다.
-
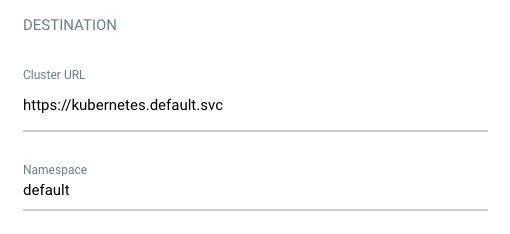
Cluster URL은 https://kubernetes.default.svc, Namespace는 default를 선택합니다. 그리고 화면 상단의 Create 버튼을 선택해 애플리케이션을 생성합니다.
-
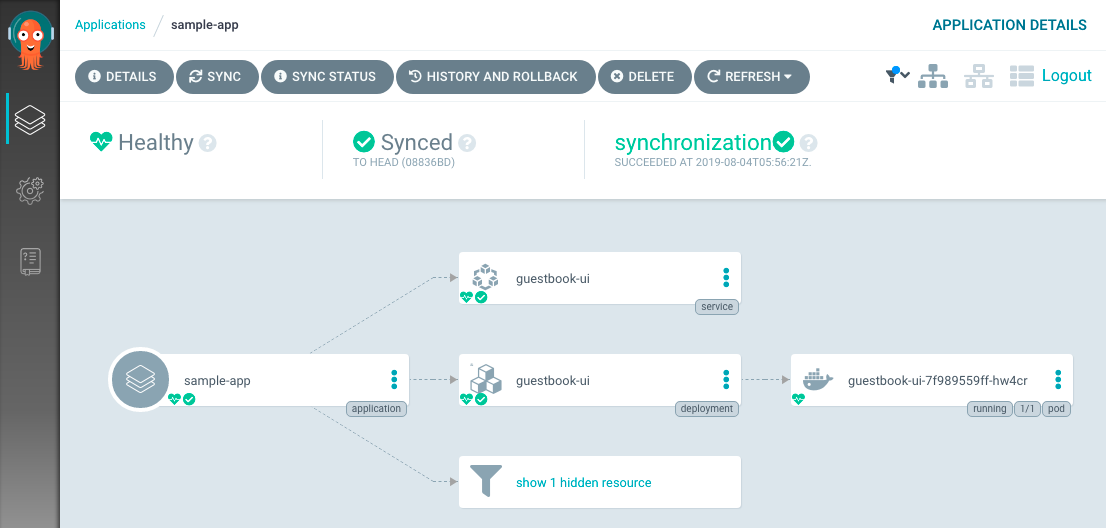
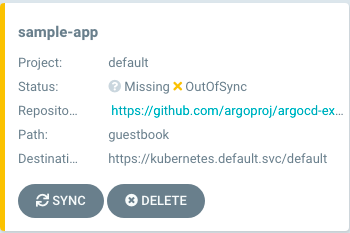
처음 배포하면 Status가 OutOfSync 상태입니다. Sync 버튼을 선택해 동기화합니다. 동기화하면 kubectl apply 명령을 실행해 애플리케이션을 클러스터에 배포합니다.
-
배포가 완료되면 아래와 같은 모습니다.